
Small & Mighty Activity #2

Butterfly Wings
Does your little one long to fly? Perhaps like a bug or butterfly? Well we have an awesome way to fulfill their dreams…
They can make their own using wildflowers, leaves and contact paper! You never know when you’ll need a nice pair of wings, so here’s how you do it.
First draw and cut out a wing shape with paper.
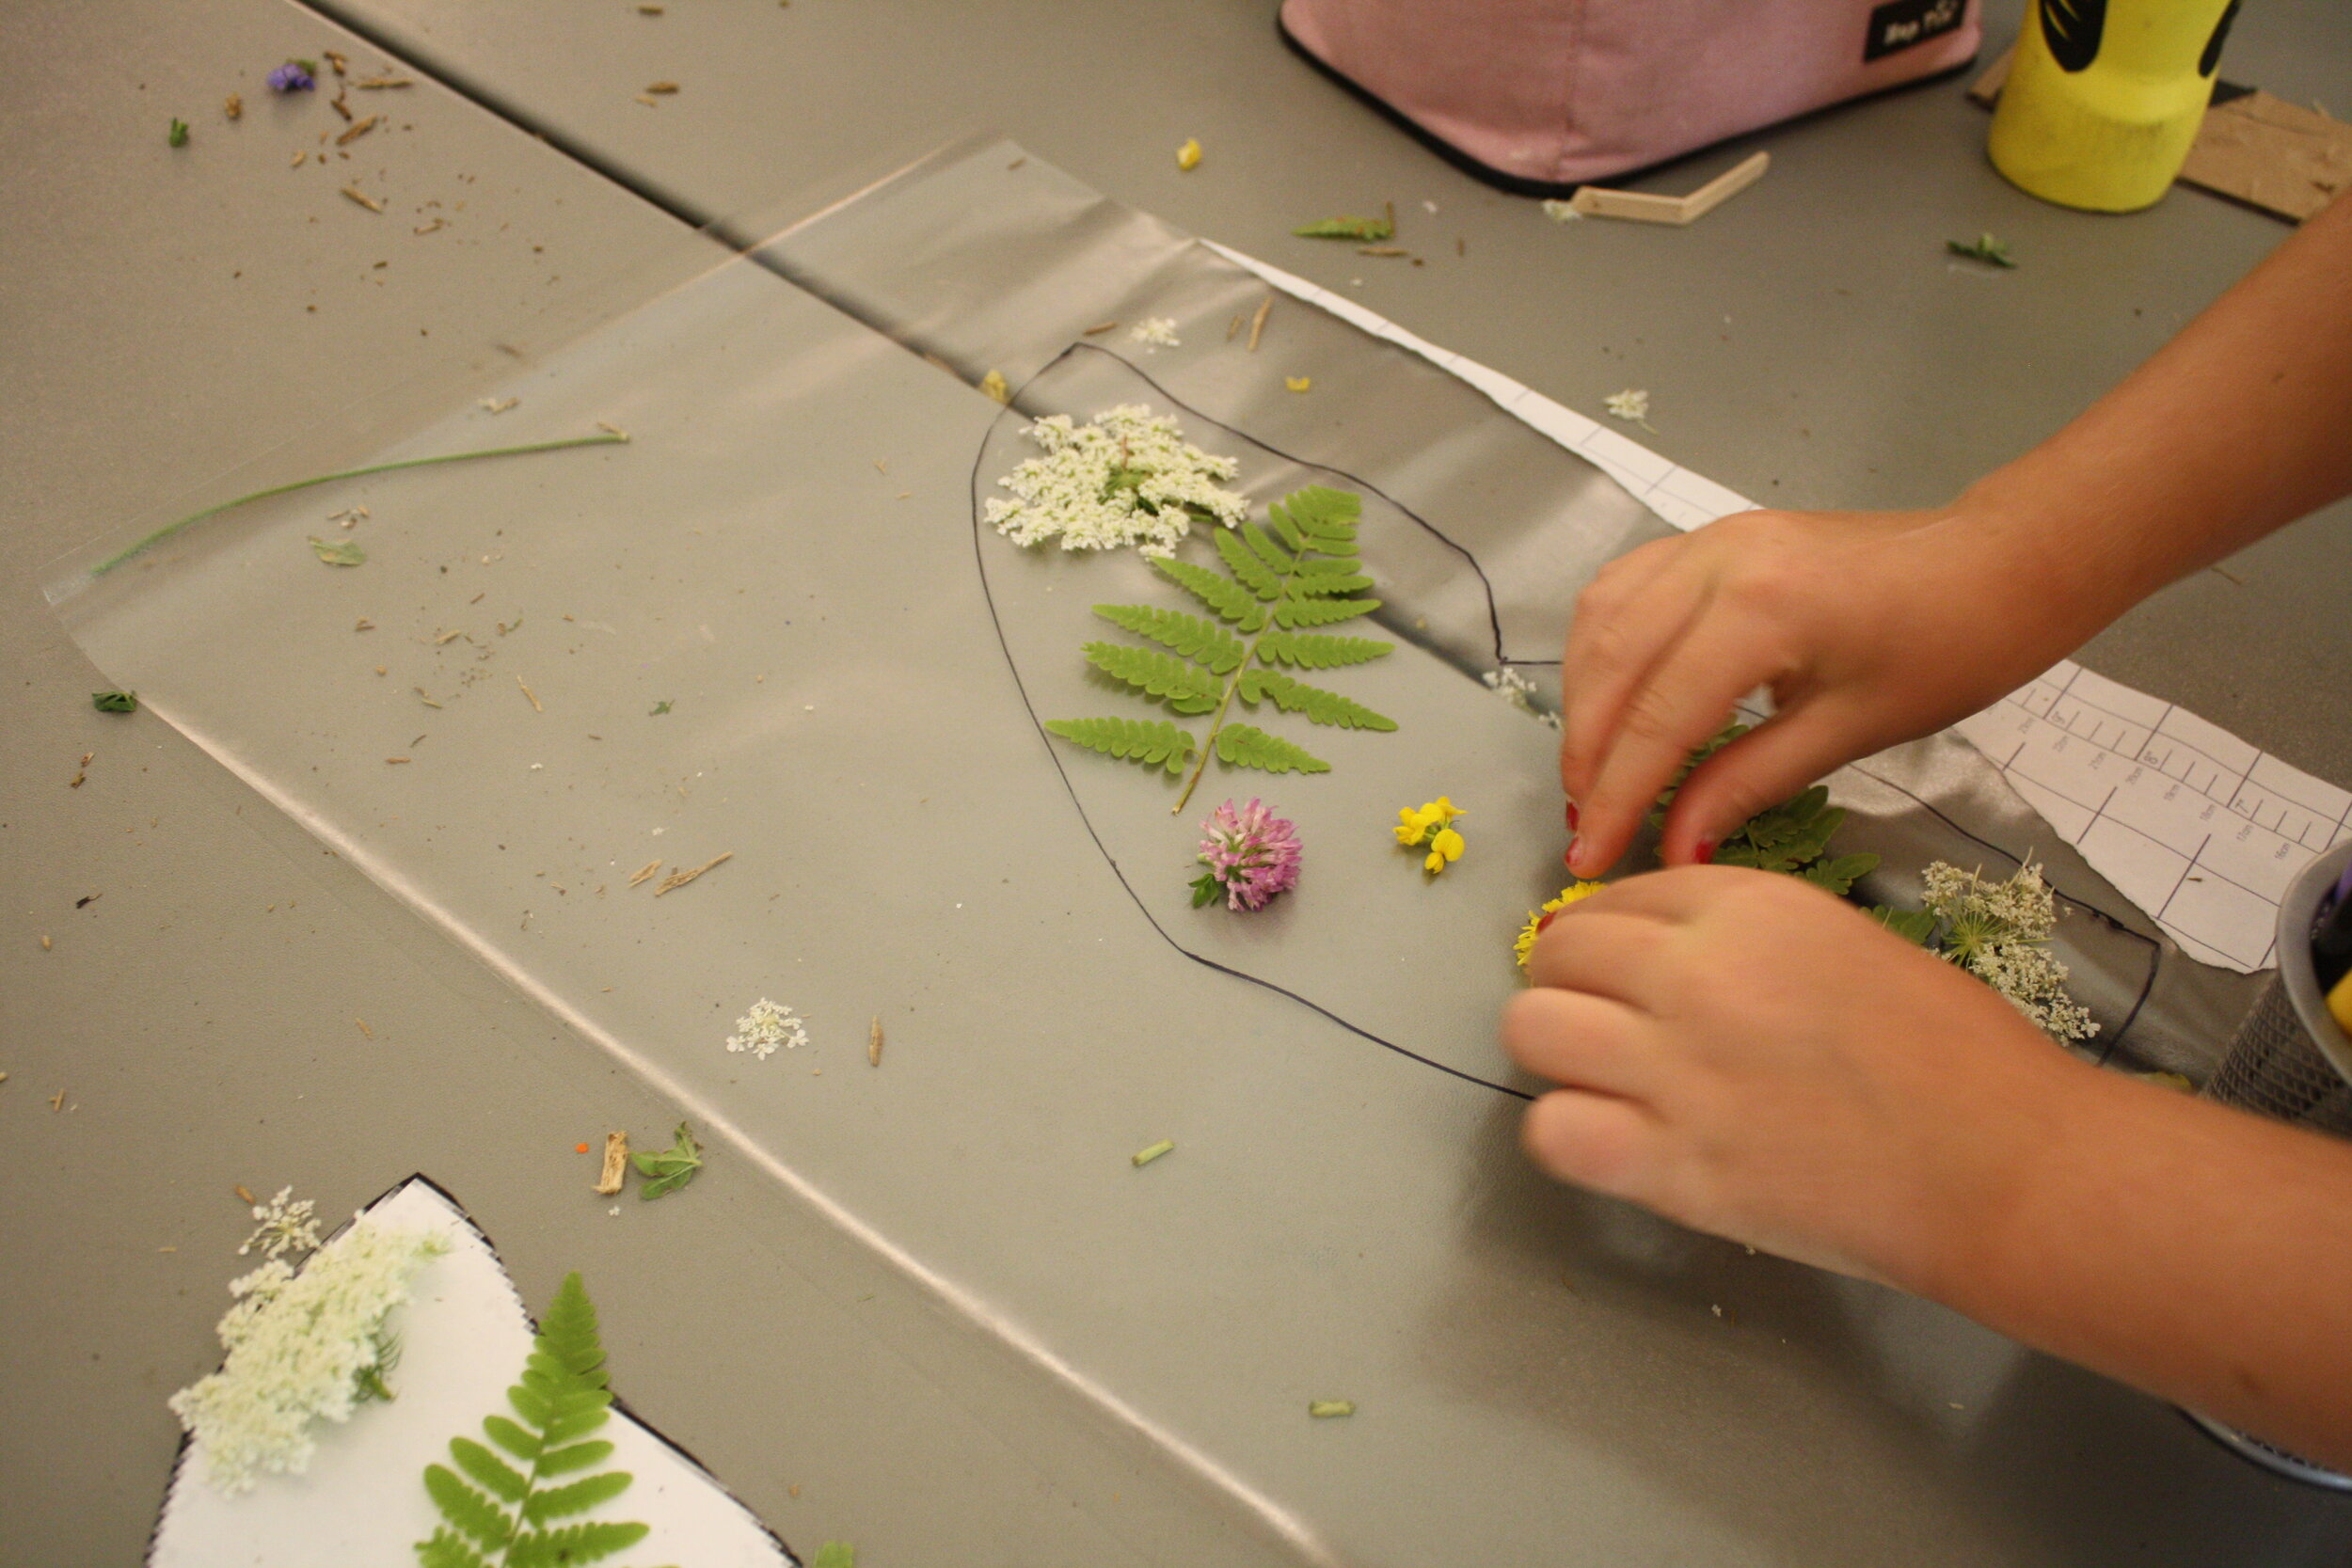
Lay your shape onto a large piece of contact paper and trace it.
Next go and collect lots of leaves and flowers (Another method to make the wings more flat is to press the leaves and flowers, but it isn’t necessary).
Now take the backing off of your contact paper, and leave the sticky side up.
Take your flowers and leaves and stick them wherever you’d like. (This can be a good way to teach your child about symmetry).
For the back you can either use more contact paper, and use the shape to trace. Or you can take the shape and use it as the back if you don’t have enough contact paper.
Now you can find a thick stick, and hot glue the wings to the stick.
Finally you can cut string arm holes so that your child can wear their wings!


Tip: Contact Paper is Super Sticky! 2 people may be required when sticking contact paper together.
This activity brought many smiles and laughter as our camp helpers were here helping us out with this one. The whole process from start (collecting flowers and leaves) to finish (putting on butterfly wings) took about 45 minutes, but it was such a relaxing project and we are really happy with the results!
We were inspired to make these beautiful sets of wings after it seeing it was featured at: https://woodlarkblog.com/diy-flower-butterfly-wings/ .
Below is a link to a video with a few more details!
“Don’t just fly, soar high!”